How to Sharpen a Karambit Curved Knife!
by Joshua Speaks
Karambit knives are considered as one of the most peculiar weapons especially for women in South East Asia because of their handy size.
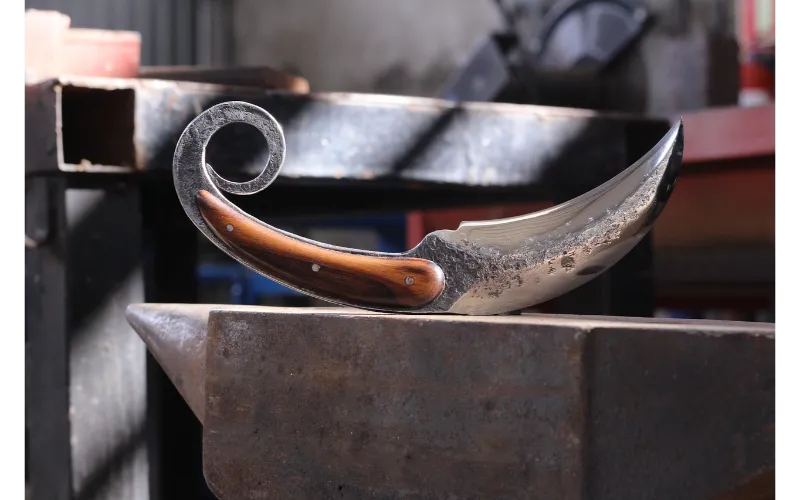
Depending upon the design, Karambit is a curved crispy blade with one, two, or multi-edges.
The design aesthetics demand skill and technique to sharpen it especially Emerson karambit.
Originated from Indonesia and flourishes in Indo-Australian Azores, these curved blades facilitate many aspects during the defense.
Over time, now these Karambit knives are considered multi-purpose tools.
The classical inner-side curved blade makes the knives pleasant to the eyes and becomes a part of your symphonies.
Moreover, the size of the knife is so combating that a woman can hide it in her hair. But, here is a challenge, the curved surface appears relatively difficult to clean and keep sharpened.
Although, It's a next-level feeling to own such an elegant tool and you must utilize it at its pace to get maximum out of it but keeping it as sharp and shiny as new need some effort and tricks.
Contents
How to Sharpen a Karambit: The Ultimate Curved Knife Blade
Being a Karambit user for quite a long, I have researched the possible methods thoroughly and present here a complete step-by-step guide to follow while sharpening curved blades and few preliminary suggestions too.
Step 1: Getting Started
Safety comes first! Before initiating the whole process regarding how to sharpen a Karambit, make sure that you have an eminent quality Cut-resistant glove specifically designed to work along with knives. Such gloves shield your hands and are specifically manufactured for knife users to keep their hands safe.
Other basic supplies include,
- Paper (To test the starting and ending point sharpness)
- A damp wet cloth piece
- Soapy water (warm water appears to be more effective)
- Dry cloth piece
- Damp cloth
- Round stone/ sharpening rod tools (medium and fine grid both)
- Other Testing material (cardboard, an old piece of cloth)
- White Tissue
To kick start the process, clean your knife thoroughly. Take a damp piece of cloth and clean the whole length of the blade. See, if the blade is clean or not else, dip it in warm soapy water and clean all the dust and drips if any from the blade and make it dry using the dry piece of cloth.
And here your knife is ready to go.
Step 2: Selection of the Right Tool
Every curved blade is technical to deal with because of all the sharp edges that run along the length of the blade. Traditional whetstones will not work on these edges, you need a round sharpening stone or a steel rod-style tool designed to sharp the curve blade.
Before selecting any tool, you must consider the size of your knife. It will decide the size of grit required, grit size is the size and the density of the grains present in the stone.
For curved surfaces, it is recommended to use either fine or medium grit and if you are unable to get around stone then go for a triangular one. Fine grit is more densely granulated and is used for finishing the process professionally, while the medium grid is less granulated but serves the job initially.
Non-tapered/ circular sharpening rods will also serve the purpose well. But before starting the procedure, make sure that the rods are stoutly secured at 15-25⁰, or the angle that suits you best.
Step 3: Position of the Knife
First thing first! Put on your safety gloves and get the knife and your tool placed on a flat clean surface. Now, hold your Karambit, make sure that the grip on the knife should be a bit flexible. It should not be too tight so that it won't allow any adjustment during the action.
Moreover, it is advised to hold a sharpening tool and knife at an angle of 15-20 degrees. Going too hard in grip and meeting the sharp edges perpendicular to your tool will not produce the desired results.
Set an angle that suits you well and checks the progress by cutting the paper after several strokes. Our goal is to make a knife sharp so that it cuts the paper without tearing it.
Step 4: Focus on Edges
It is the main focal point of the whole process. Hold the knife away from yourself with the sharpening edge facing the ground. Initiate the stroke from end to end in a single go. If you are using a sharpening rod stroke the steel of the rod on the blade edge very lightly. There is no need to use any force. Count the number of a stroke to get even sharpness at both sides of the edges.
For a sharpening rod with a dual sharpening setup, it is recommended to stroke both the edges one by one, like one stroke at one side and simultaneously one stroke at the other followed by a second stroke at the first side. Be careful, whatever rod type you are using the stroke should be steady and light, don't hit or use force on the knife blade, simply.
Before taking any sharpness test stroke the knife at least 18-20 times and don't forget to maintain a shallow angle between the tool and the knife. Start the strokes using a medium grid and when you feel you are about to reach your desired sharpness use the fine grid to make those edges shine and sharp as new.
Step 5: Use the Fine Grit
Although medium grit sharpening tools do their job effectively, we always need a fine grit in the end to finish the extremely shiny, razor-sharp look of our Karambit knife.
The rest of the procedure will remain the same. Be careful about the angular position between the knife and tool, use steady strokes, and repeat the strokes 18-20 times before taking any sharpening test. And, lastly cut the paper to check the results consecutively.
Step 6: Focus On Gaps
If you use a fine grit stone there is a chance that you might miss some edge gaps, but this will not happen with the rod tool. That's why it is a better choice to use any long rectangular or triangular-shaped steel rod tools.
And definitely, the tool should be a fine grit, properly angled followed by slight strokes repeatedly for 10- 15 times. Now, check the sharpness by conducting the paper test and repeat the process if the desired sharpness is not achieved yet.
Step 7: Final Sharpness Test and Cleaning
By now, you should have a shiny sharp Karambit in your hand. You may repeat the procedure as many times as you want to get the desired results. After finishing the process, take warm soapy water in thoroughly clean the knife with a damp piece of cloth to get rid of all the residue.
Now, put the knife to get dry and take the sharpening test again. It is better if you opt to take a test on paper and other relevant material too, like cardboard or any old piece of soft cloth.
Preliminary Suggestions - Must Read Instructions:
1. You must know the ultimate goal you want to achieve, whether sharpening a knife or honing a knife.
2. For every curved blade, many cutting edges run across the length of the blade, so traditional sharpening blocks, don't justify the job. But, thanks to this era of industrialization, we have many tools available to get the job done accurately.
3. It is important to keep track and decide the intensity of sharpness you require. To serve the purpose, conduct a test to check the starting point of sharpness your folding Karambit knife has.
Now, quickly jump into the step-by-step process.
Points to Ponder:
Now your Karambit is as sharp and shiny as new. But there are few points to keep in mind:
- The procedure will eventually become easier as soon as you finish your first batch of strokes.
- Clean your tool also soon as you are finished with sharpening. It is essential to take off any residue especially from the fine grit tools.
- Make notes on the number of strokes in one batch. This is because we need to stroke both sides of the blades equally.
- Adjust the angle of your tool, hand, and knife. Keep it small to ensure better blade-to-tool contact for stropping a Karambit.
- Always strike the blade progressively with a light hand.
- Always use warm soapy water to finish the sharpening for eminent outcomes.
- Focus on gaps that might be left behind on edges.
- Always use Fine grit to finish the job.
Also Check:- Best Pocket Knife Sharpener
How to Sharpen a Karambit: Video
Takeaways: How to Sharpen a Karambit
To recapitulate, the whole process will take around 5-10 minutes. To save your time, make all the preparations beforehand and get your tools ready. Moreover, repeat the batch of strikes around 8-12 times to achieve the required sharpness.
Once you get your hand on 1-2 batches, you will track the whole sum of steps mentally and the process will become more easy and achievable for you. Read the whole guide again, if still have any ambiguities and let us know in the comment box below what you get from our guide of How to Sharpen a Karambit.
Last but not the least, Sharpening the curved Karambit is a bit technical still achievable. Just care of the angles, strokes, and gaps. Don't forget to use Fine Grit to finish up. And here is your Karambit gleaming crisply.

About Joshua Speaks
Can’t think of a day that that Josh didn’t have a beer or two. Be it a long day of work or of nothing. Sometimes, it is a few packs even. Especially when there are familiars over.
His fridge is packed with beers: Heineken, Corona, Guinness, Budweiser, and all other wierd brands in between. He had to get a secondary 30 cu. fridge off Craigslist for more beer storage.
Sometimes he wonders if a day truly starts only after the first sip of beer for the day. Enough talk about Josh and his passion; that’s the reason for this beer blog and related items. Feel free to hit on him. Start with something like: “hey beer head!” You got the idea!
Thoughts on "How to Sharpen a Karambit Curved Knife!"
 |
 |
 |
 |
Kitchen - Outdoor